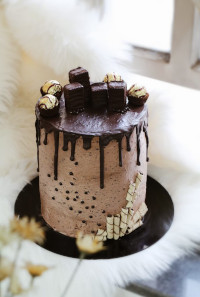
Wedding Cake Stands

How to prepare & assemble Wedding Cake
Wedding cakes are assembled using one of four techniques: tiered, stacked, combination, or stepped.
To tier a cake means to arrange tiers above a table surface, usually one above the other using a system of support. Tiered cakes are stacked vertically with a space between each tier, all or part of the supporting structure visible to the eye. This supporting structure can be anything, from plastic pillars to champagne flutes.
Stacked cakes are set one on top of the other, each tier supported by an internal, unseen structure, usually wooden dowels, plastic straws, or plastic columns, cut to the exact height of the tier.
Combination cakes will combine stacked and tiered methods of tiering.
Stepped cakes use alternative methods of tiering arranged in a non-vertical fashion. Styles of stepping cakes are limitless, from formal Plexiglas systems, to mirrored columns to theme based non-matching items such as combinations of glass objects (wine glasses, cake pedestals and champagne flutes) or silver objects (silver goblets, silver bowls and silver platters).
How to assemble prepared cake
Place base tier on a sturdy base plate of 3 or more thicknesses of corrugated cardboard. For heavy cakes, use Masonite or plywood. Base can be covered with Fanci-Foil Wrap and trimmed with Tuk-N-Ruffle or use Wilton Ruffle Boards. Each tier of your cake must be on a cake circle or board cut to fit. Smear a few strokes of icing on boards to secure cake. Fill and ice layers before assembly.
To Dowel Rod Cakes for Pillar & Stacked Construction
Center a cake circle or plate one size smaller than the next tier on base tier and press it gently into icing to imprint an outline. Remove circle. Measure one dowel rod at the cakes lowest point within this circle. Using this dowel rod as a measure, cut dowel rods (to fit this tier) of the same size using pruning shears. If the next tier is 10-inch or less, push seven 1/4-inch dowel rods into cake down to base within circle guide. Generally the larger and more numerous the upper tiers, the more dowels needed. Very large cakes need 1/2-inch dowels in base tier.
Stacked Construction
This method is often combined with pillar construction. Dowel rod bottom tier. Center a corrugated cake circle, same size as the tier to be added, on top of the base tier. Position the following tier. Repeat procedure for each additional tier. To keep stacked tiers stable, sharpen one end of a dowel rod and push through all tiers and cardboard circles to base of bottom tier. To decorate, start at top and work down.
Pillar Construction
Dowel rod tiers. Optional: Snap pegs into separator plates to prevent slipping (never substitute pegs for dowel rods). Position separator plates on supporting tiers, making sure that pillar projections on each tier will line up with pillars below. Mark center backs of cakes. Decorate cakes. At reception, align pillar projections and assemble cakes on pillars.
Fast and Easy Push-in Leg Construction
Dowel rods are not needed, because legs attached to separator plates push right through the tiers down to the plate below.
Ice cakes on cake circles. To mark where legs will go, simply center separator plate for tier above (projections down) and gently press onto the tier. Lift plate off. Repeat this procedure for each tier (except top). Then Position upper tiers on different Separator plates. Decorate cakes.
How to assemble the cake on stand
Insert legs into cake at marks. Push straight down until legs touch cake board. Add plate with cake to legs. Be sure plates are securely fastened to legs. Continue adding tiers in this way until cake is assembled.
Center Column Construction with Tall Tier Stand
Each cake involved in this type of construction should be placed on a cake circle or board (cut to fit) with a pre-cut center hole. To do this, trace pan shape on waxed paper. Note: To make positioning easier, place top tier on a board slightly larger than cake. Fold pattern into quarters to determine the exact center of each tier. Snip away the point to make a center hole (use cake corer as a guide to size). Trace whole pattern onto boards and cut out.
Place all tiers on prepared cake boards, attaching with a few strokes of icing. Ice tiers smooth. Then Core out cake centers by pushing the cake corer down to the cake base. Pull out and press cake out of corer.
Screw a column to prepared base plate, attaching with the bottom column bolt from underneath the plate. Slip bottom tier over the column to rest on plate.
The bottom of the plates will not sit level, so to decorate, set plates on the Flower Holder Ring, a pan or bowl.
Since the column cap nut attaches under the top cake, this cake must be positioned after assembling the Tall Tier Stand. Add base borders after assembling the top tier. Or you may place the top tier on a foil-covered cake circle so decorating can be done ahead.
To assemble at reception, position plate onto base column section and screw column tight. Continue adding tiers with columns. At top plate, secure columns with cap nut bolt. Position top tier and decorate.
Hints for Tiered Cakes
Before placing separator plate or cake circle atop another tier, sprinkle a little confectioners sugar or coconut flakes to prevent plate or circle from sticking. Letting icing crust a bit before positioning plate on cake will also prevent sticking.
You will have fewer crumbs when icing if cakes are baked a day in advance.
When filling or torting large layers, use less than you usually would. Your dam of icing should also be far enough from edge so filling doesnt form a bubble.
When transporting tiers, place cakes on non-skid mat, damp towels or carpet foam and drive carefully.
To keep balance, cut cakes on the Tall Tier Stand from top tier down.
To divide tiers, use the Cake Dividing Set. The Wheel Chart makes it easy to mark 2 in. intervals on 6 to 18 in. diameter cakes. The garland marker gives precise spacing for string work and garlands. The raised lines on separator plates can also be followed for each dividing.
When using Spiked Pillars and stacked construction, double cake boards or use separator plates between layers to prevent the weight of tiers from causing the pillars to pierce through cake.