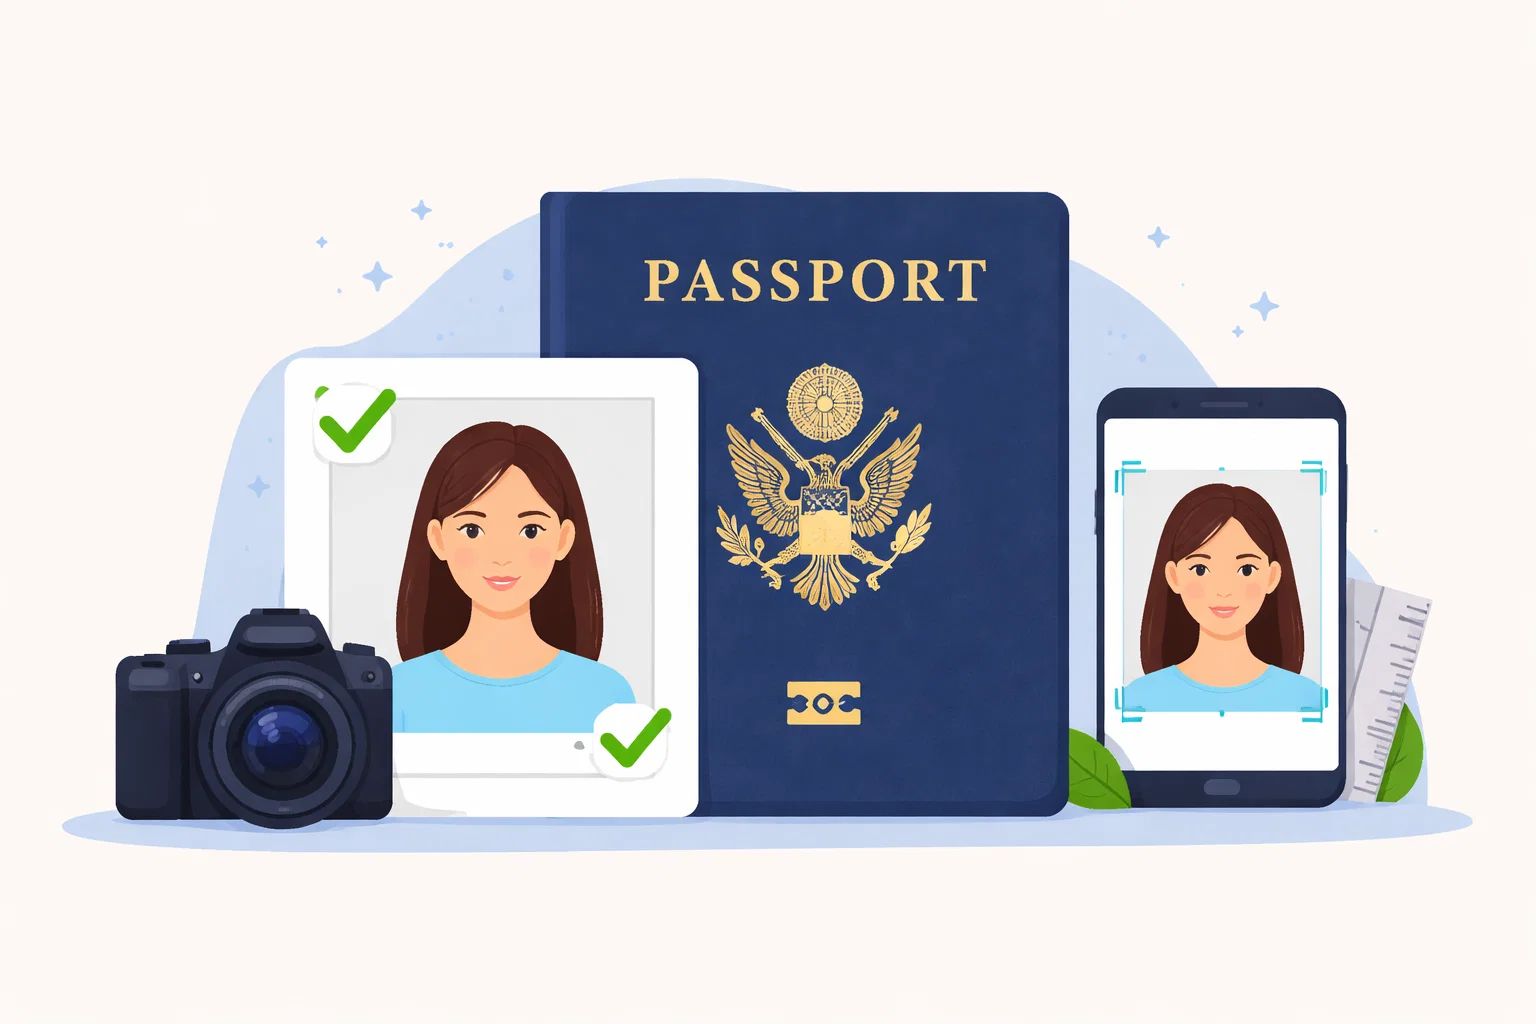
How to Make a Passport Photo That Meets US Government Requirements
Having your passport photo rejected is one of the most infuriating — and easily avoidable — holdups in the passport application process. The good news is that you don't have to go to a drugstore or photo studio to get it right. Using just a smartphone, a blank wall, and a few minutes of your time, you can take your own US passport photo from home.
This guide covers everything from how to prepare your space and take the photo, to how to comply with the US State Department's specifications, and even how to get the photo ready for submission — whether you're a first-timer, or you're renewing by mail or online.
What You'll Need
Before you snap a single picture, gather all of this ahead of time. Having everything prepped will keep you from having to stop and start in the middle of your shoot.
-
A smartphone or digital camera — Most modern smartphone cameras are sufficient. No need for anything fancy.
-
A plain white background — A plain white wall or white sheet will work. Use a flat white sheet, poster board, or any clean, smooth surface.
-
Good natural light — A room with a large window is ideal. You won't need any special lighting gear.
-
A tripod or a helper — A friend or family member holding the camera works best. A tripod with a self-timer is a good alternative.
-
An online US passport photo tool — You'll need this to crop, resize, and validate your photo. PhotoGov is a reliable option that validates your photo against official standards for free.
-
A printer or access to a print shop — Only required if you're submitting a physical photo (paper application). If you're renewing by mail, an online download is all you need.
That's it. No studio lighting, no professional gear, no appointment necessary. Ready? Let's set up your space.
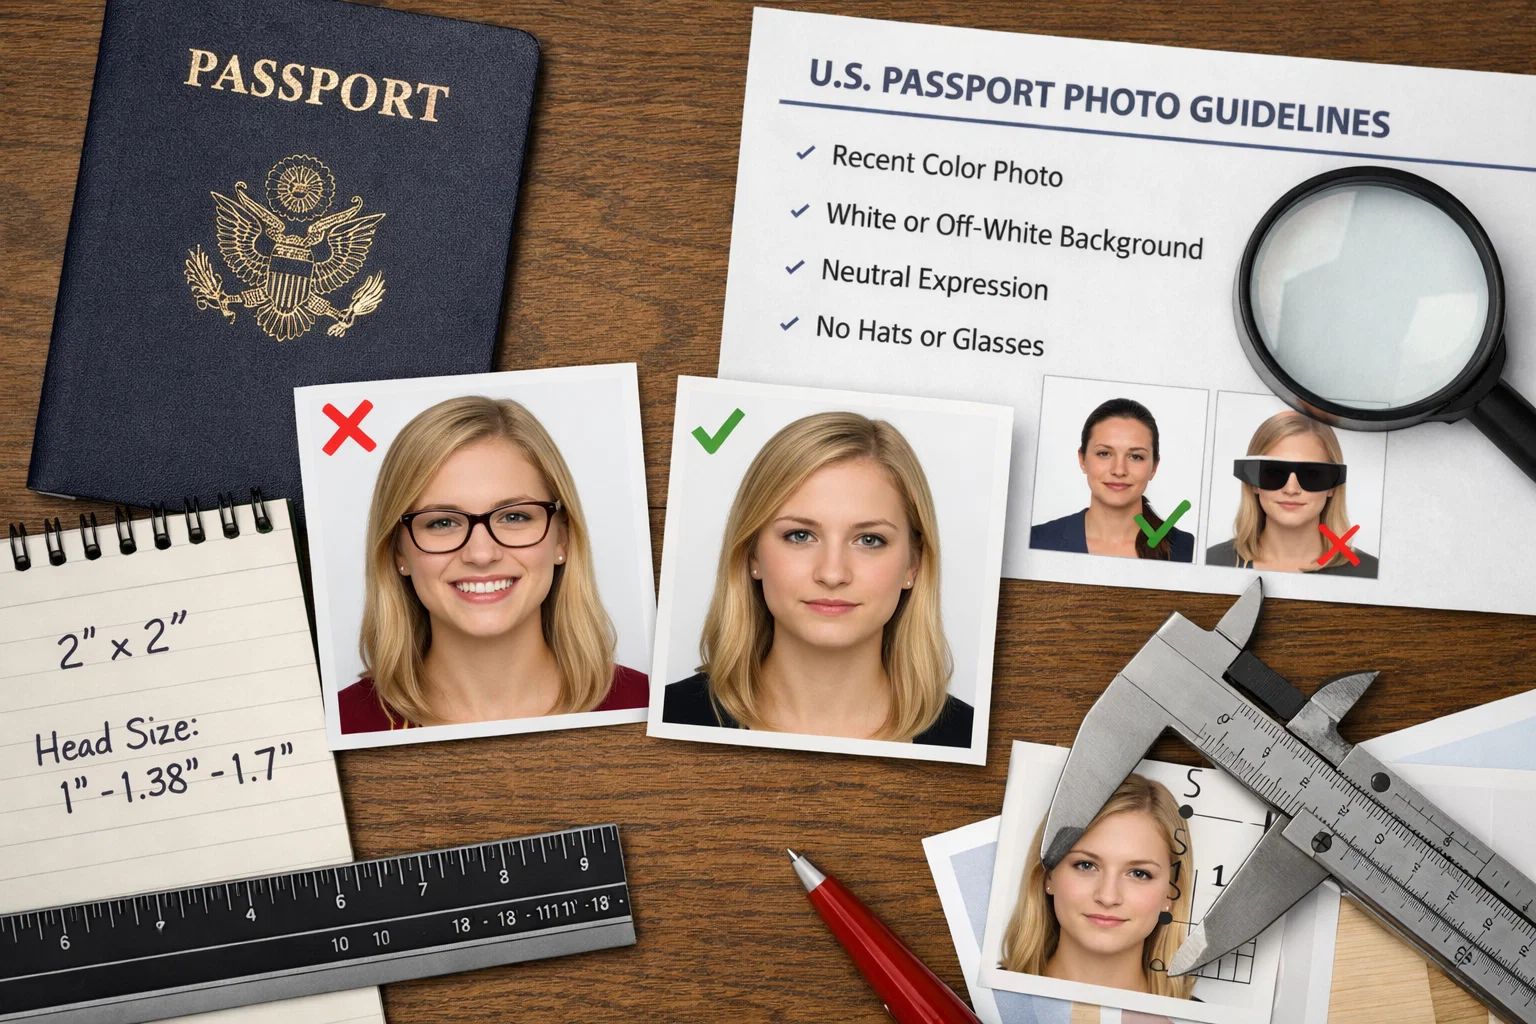
Your background is the first thing a passport inspector will look at — and it's one of the biggest reasons photos get rejected. Getting it right before you take a single shot can save you from a surprising number of wasted attempts. The US State Department requires the background to be plain white or off-white with no patterns, textures, or shadows, and no objects visible behind you. That means no wallpaper, no curtains peeking in from the side, no furniture in the shot, and no shadows from you or your lighting. Here's how to get it right: Find a plain white wall. A freshly painted white or off-white wall inside your home is ideal. Avoid textured walls such as brick or wood. No white wall? Use a sheet. Hang a plain white sheet, a white foam poster board, or a large sheet of white paper to cover the wall behind you. Make sure there are no wrinkles or folds that could cast shadows. Step away from the backdrop. Stand 3 to 4 feet in front of your background — don't press against it. Distance prevents your shadow from falling on the surface behind you. Test the frame before you shoot. Have your helper hold up the camera and take a test shot. Look closely — if you see any objects, colored walls at the edges, or shadows behind you, stop and adjust. ⚠ Note: A background that reads as dark cream, gray, or off-white may result in rejection. When in doubt, pick up a white foam poster board at any dollar store or office supply store — it's inexpensive, flat, and reliably white. Lighting is probably the most underestimated element of a DIY passport photo — and the one most likely to get it rejected if done incorrectly. The State Department will disqualify photos with shadows on your face, shadows on the background, or uneven lighting that obscures your features. The good news is you don't need anything special to get it right. Here's how to get great lighting with what you have: Use natural light from a window. Position yourself facing a window so that light falls on your face from the front. This is the best lighting option for a home passport photo — soft, even, and shadow-free. Don't stand with the window behind you. Backlighting creates a silhouette and casts shadows on your face. Always face your light source, never turn away from it. Avoid harsh overhead lighting. Ceiling lights and downward-pointing lamps create shadows under your eyes, nose, and chin — all areas that can trigger rejection. If overhead lighting is unavoidable, add a lamp positioned directly in front of you at eye level to fill in those shadows. Check both your face and the background. Take a test shot and examine both carefully. Your face should be evenly lit with no shadows or dark spots, and the background should appear bright white with no shadows from your body. 💡Pro Tip: Overcast days are actually ideal for passport photos. Cloud cover acts as a natural diffuser, producing soft, even light with no harsh shadows. If you have flexibility in when you shoot, aim for a cloudy afternoon near a large window. If you're shooting at night, set up two lamps of equal brightness at eye level — one to your left and one to your right — to create balanced, even lighting. With your background set and your lighting dialed in, it's time to take the photo. This is the step where people either get it right or create problems that no editing tool can fix — so be patient, take plenty of shots, and don't settle for the first one. Follow these tips to get a usable photo in a single session: Use the rear camera, not the selfie camera. The front camera on most phones has a wide-angle lens that distorts your facial features at close range. The rear camera produces a more accurate, natural image. Keep the camera 3 to 4 feet away, at eye level. Too close and your face gets distorted. Too far and you won't have enough resolution to crop correctly. Hold the camera at eye level — not angled up or down. Have someone else take the picture. This is the best approach. Give your helper a simple direction: center your face in the frame, keep your shoulders visible at the bottom, and hold the camera steady. If you're shooting alone, a tripod with a self-timer works well. Compose the shot correctly. Your entire face and the top of your head should be visible, with your shoulders visible at the bottom of the frame. Don't crop too tightly in-camera — leave space around your head. You'll crop to the exact size later. Use a neutral expression. You must have a neutral expression, both eyes open, and your mouth closed — this is a US State Department requirement. A slight, natural closed-mouth smile is fine, but showing teeth or squinting can cause rejection. Look straight into the camera lens, not at the screen. Take at least 10 shots. Blinks, slight head tilts, and shadows you didn't notice in person have a way of appearing in photos. Give yourself plenty to choose from. Once you have a batch of shots you're happy with, the next step is making sure the photo meets every official specification before you submit it. Tools like PhotoGov let you upload your photo, automatically check it against US government standards, and generate a properly sized, government-ready file — free with their passport photo tool. It removes the guesswork from the compliance step entirely. ⚠ Important: Do not use your front-facing (selfie) camera, even if it's high resolution. Most front cameras have a wide-angle lens that alters the proportions of your face — especially your nose and forehead — in a way that's subtle in casual portraits but obvious when printed at 2×2 inches. Always use the rear camera. Before uploading or printing, make sure your photo complies with every requirement on the official US State Department specification list. Reviewers scrutinize these requirements closely, and a single issue — a slight shadow, a head size that's slightly off, an unsupported file format — can hold up your entire submission. Printed photo must be 2×2 inches (51×51 mm) For online/digital submission, the photo must be at least 600×600 pixels and no larger than 1,200×1,200 pixels Digital file size must be between 54 KB and 10 MB Accepted file formats: JPG, PNG, HEIC, or HEIF Your head (chin to crown) must measure between 1 inch and 1⅜ inches (25–35 mm) in the printed photo Your eyes should be 1⅛ to 1⅜ inches from the bottom of the photo Center your head and keep it level — no tilting, turning, or angling Must be plain white or off-white No patterns, textures, gradients, or objects No shadows behind you Neutral expression — eyes open, mouth closed, looking directly at the camera A mild, natural closed-mouth smile is permitted No eyeglasses of any kind, unless you have a documented medical necessity supported by a signed doctor's statement No hats or head coverings unless worn daily for religious or medical reasons (a supporting statement must accompany the application) Hair must not cover your eyes, eyebrows, or any part of your face Must be in color — black and white photos will not be accepted Must be clear, in focus, and high resolution — no blurring, graininess, or pixelation Must have been taken within the past 6 months No filters, retouching, or digital manipulation of any kind — this includes beauty filters, skin smoothing, or color grading that alters your appearance No AI-generated or AI-modified photos — the State Department specifically prohibits photos created or heavily modified using digital tools The complete and most up-to-date official requirements can be found directly on the US State Department passport photo page at travel.state.gov. 💡 Pro Tip: Bookmark that State Department page and check it before every application — not just the first one. The submission guidelines are subject to change, and your photo must meet the requirements in effect at the time of submission. Having a great photo that meets all the visual requirements is only half the job. Before it's ready for submission, your photo must be cropped and sized to exact specifications. This is where many people run into trouble — the dimensions have to be precise, and eyeballing it with your phone's native photo editor is almost never accurate enough. Here's how to get the sizing right: For most people, this is the easiest and quickest method. Upload your selected photo to PhotoGov, and the system will center your face, crop the image to the correct dimensions, measure your head size, verify that the background meets requirements, and flag any compliance issues before you download. You get a finished file ready to submit digitally or print — no photo editing expertise required. This is especially helpful if you're not comfortable working with image dimensions yourself. If you prefer to do it yourself, here's what you'll need to do: Set your canvas to a square aspect ratio — 2×2 inches at 300 dpi for print, or a minimum of 600×600 pixels for digital Position your head so that it occupies between 50% and 69% of the total image height (chin to top of hair) Center your face horizontally in the frame Make sure your shoulders are visible at the bottom of the crop Export as a high-quality JPG — avoid heavy compression, which reduces image quality and can trigger rejection for pixelation The US State Department also offers a free Photo Tool at travel.state.gov that handles basic cropping for paper applications. It's worth using as a secondary check, but keep in mind it only crops — it doesn't check for compliance, head proportions, or background quality. ⚠ Important: Don't just resize your photo to 2×2 inches — also verify that your head measures between 1 and 1⅜ inches within the frame. A photo can have the correct overall dimensions and still be rejected if the head is too small or too large. The overall crop and the head size are two separate requirements. Your photo is now cropped, resized, and validated — it's time to convert it to the format required by your application. Whether you need a physical print or a digital file depends on how you're submitting your passport application, so double-check that before moving forward. If you're applying through the online renewal process, you'll upload your photo file directly to your application. Download your final photo as a high-resolution JPG and store it somewhere easy to find on your computer. Confirm the file meets the digital specifications from Step 4: correct pixel dimensions, file size between 54 KB and 10 MB, and no compression artifacts. Avoid taking a screenshot of your photo or sending it through a messaging app — both will compress the image and reduce quality in ways that may not be obvious until your photo is flagged during review. If you're applying for the first time, renewing by mail, or applying in person at a passport acceptance facility, you'll need a physical 2×2 inch print. Here's how to get it right: Use photo-quality paper. The State Department requires photos to be printed on matte or glossy paper — standard printer paper will result in rejection. Verify your print resolution. The photo should be sharp and clear at 2×2 inches, with no distortion, pixelation, or visible dot patterns. If your home-printed photos look soft or grainy, use a commercial print service instead. When in doubt, go commercial. Pharmacies, office supply stores, and big-box retailers all offer photo printing services. Many let you upload an image file and have prints ready in minutes. Some services also accept emailed files and mail prints to you, so you never have to leave home. Print multiple copies. Most passport applications require only one photo, but printing two or three is worth the minimal cost — you'll have backups if one gets damaged, or if you need extras for another application or a visa requirement. ⚠ Important: Do not print your passport photo on standard copy paper, even if the photo itself is technically correct. The State Department specifically requires photo-quality paper — either matte or glossy. A photo printed on the wrong paper stock will be rejected regardless of how good it looks on screen. This is the step most people skip — and the one that would save them weeks of delay if they just took five minutes to do it. Catching a problem now costs you nothing. Catching it after submission costs you time, postage, and stress. Do the following before your photo goes anywhere near your passport application: Is the background plain white or off-white with no shadows, objects, or color? Is your face evenly lit with no shadows on your forehead, nose, cheeks, or chin? Are both eyes open and unobstructed, with hair away from your face? Is your expression neutral — mouth closed, looking straight at the camera? Are you free of glasses, hats, or head coverings (unless for religious or medical reasons)? Is the photo sharp, in focus, and free of pixelation, blur, or grain? For print: Is the photo exactly 2×2 inches, printed on matte or glossy photo-quality paper, and not laminated? For digital: Is the file in JPG, PNG, HEIC, or HEIF format? Is the file size between 54 KB and 10 MB? Is your head size within the required range — between 1 and 1⅜
inches (25–35 mm) from chin to the top of your hair in the printed version? Was the photo taken within the last 6 months? If not, take a new one. Is the photo completely unedited in terms of appearance? No filters, smoothing, color adjustments, or retouching of any kind? If applying by mail, you can use the US State Department's free online Photo Tool at travel.state.gov to verify that your crop is correct for paper applications. As noted earlier, this tool does not perform a full compliance check — but it gives you a reliable second opinion on sizing before you print. 💡 Pro Tip: If you took and edited your photo using an online passport photo tool like PhotoGov, you've already passed most of these checks by default. Treat this as a final confidence check rather than a full review — scan the visual checklist, confirm the file specs, and you're good to go. Even careful applicants can get rejected over a small oversight. These tips will help you avoid the most common surprises — especially if you're new to the process. 1. Don't wear white or light-colored clothing. If your shirt is white, cream, or light gray, the edges of your shoulders can fade into the white background, making it difficult for reviewers to see your silhouette. Wear a medium or dark-colored top to ensure clear contrast. 2. Always have someone else take the photo. Yes, a tripod and self-timer is workable — but it's difficult to gauge your own framing, expression, and lighting at the same time. A helper can adjust the camera angle, watch the live frame, and flag a shadow or head tilt you'd never catch on your own. Five minutes with another person beats twenty minutes of solo trial and error. 3. Take far more shots than you think you'll need. Plan to shoot at least 10 to 15 frames. Blinks, micro-expressions, slight head movements, and shadows invisible to the naked eye all show up in photos. You want to be choosing the best shot, not the least bad one. 4. Make sure your hair isn't in the way. Your hair should not fall over your eyebrows, cover one eye, or cast a shadow across any part of your face. Pull your hair back before the session, or use bobby pins if needed. Your full face — from chin to hairline — must be clearly visible. 5. Don't shoot in direct midday sunlight. Harsh direct sunlight creates strong shadows under your brow, around your nose, and beneath your chin. Soft daylight — on an overcast day, or from early morning or late afternoon sun through a window — produces far more even, technically compliant results. 6. Confirm the photo is current before submitting. If you took your shots a while ago and your application was delayed, check the date before you file. Your photo must reflect your current appearance and be taken within the last six months. If you're close to that limit, take a new set — it's not worth a rejection over a technicality. 7. For babies and infants, use a white sheet on the floor. Infant passport photos follow the same background and lighting requirements but come with unique positioning challenges. Lay your baby on their back on a plain white sheet and photograph them from directly above. Make sure no hands — yours or theirs — appear in the frame, and that there are no shadows across the baby's face. It may take a few attempts, but shooting straight down over a white background is the most reliable method. Yes, absolutely. The US State Department does not require your photo to be taken by a professional or at a specific location. If your photo meets all the requirements — correct size, white background, proper lighting, neutral expression, no filters, and no alterations — you can take it at home with your smartphone. Millions of people do it successfully every year. The key is to follow the instructions closely and use a reliable tool to crop and validate the photo before you submit it. For paper applications, the printed photo must be exactly 2×2 inches (51×51 mm), with your head measuring between 1 and 1⅜
inches from chin to the top of your hair. For digital submissions via the online passport renewal system, your photo must be at least 600×600 pixels and no larger than 1,200×1,200 pixels, with a file size between 54 KB and 10 MB. No. The background must be plain white or off-white — a very faint warm or cool off-white is acceptable. Colored, textured, patterned, or gradient backgrounds are not permitted, and neither are any objects in the frame. A shadow on the background is also grounds for rejection, even if the wall itself is the right color. If your wall has a slight cream or light gray tint, it may be acceptable as long as it's well-lit and shadow-free. When in doubt, use a white foam poster board for a guaranteed neutral background. A slight, natural, closed-mouth smile is permitted. A broad smile, an open-mouth smile, or any expression that significantly changes your appearance is not acceptable. The official requirement is a neutral expression with both eyes open. Think of the relaxed, at-ease expression you'd have in a calm moment — not your biggest grin, and not a blank stare. Showing your teeth will likely result in rejection, so keep your lips together even if a broader smile feels more natural. Your passport photo must have been taken within the last six months and must accurately represent your current appearance. This ensures that the photo in your passport matches how you look at the time of travel. If your appearance has changed significantly — notable changes in hair, weight, or facial features — you should take a new photo even if your existing one is still technically within the six-month window. When in doubt, take a fresh photo. A rejected photo delays your entire application, and it's not a risk worth taking. Taking a passport photo that meets US government requirements is something you can do entirely from home — and once you know what reviewers are actually looking for, it's straightforward. A plain white background, natural front-facing light, a rear camera held at the right distance, and a final photo that's properly cropped and sized are the four core elements of a compliant passport photo. Get those right, run through the final checklist in Step 7, and you should sail through without any issues. The steps in this guide apply whether you're applying for a passport for the first time, renewing by mail, or submitting digitally through the online renewal process. They also apply to US visa photos, which follow the same — and in some cases even stricter — specifications than the State Department's passport requirements. The most common reason passport applications get held up isn't complicated — it's a photo that could have been fixed in five minutes with the right tool and a quick checklist. Don't let that be your application. Ready to take the guesswork out of the process? Use PhotoGov's free passport photo tool, upload your photo, validate it against official US government requirements, and download a submission-ready file — no account needed, no cost, no reviewer interaction required.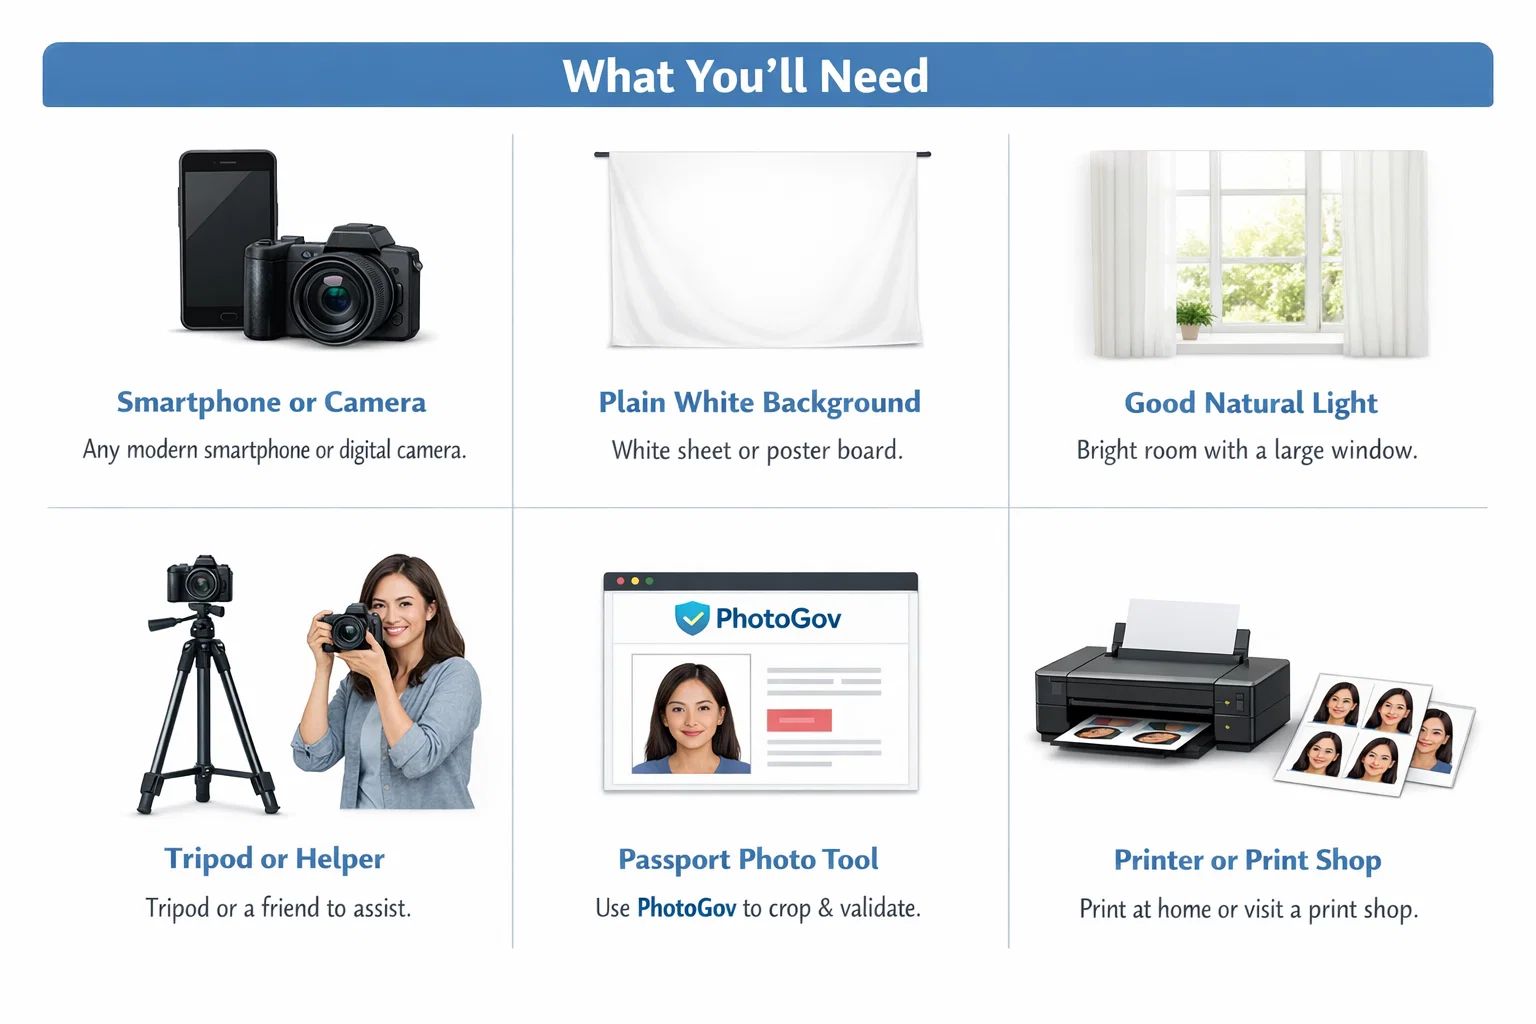
Step 1 — Prepare the Environment
Step 2 — Get Your Lighting Right
Step 3 — Take the Shot
Step 4 — Verify the US Passport Photo Requirements
Size and Dimensions
Head Size and Position
Background
Expression and Appearance
Photo Quality
Step 5 — Upload and Crop Your Photo to the Right Size
Option 1 — Use an Online Passport Photo Tool (Recommended)
Option 2 — Manual Cropping with a Photo Editor
Step 6 — Download or Print Your Completed Photo
Digital Download — For Online Passport Renewals
Photo Print — For Paper Applications and In-Person Submissions
Step 7 — Double-Check Your Photo Before You Submit
Visual Checklist
Technical Checklist
Use the State Department's Free Tool as a Final Crop Check
How to Get It Right the First Time
Frequently Asked Questions
Can I take my own passport photo at home?
What size is a US passport photo?
Can I use a non-white background in my passport photo?
Can I smile in a US passport photo?
How old can my passport photo be?
Conclusion