How to Incorporate a Stamped Concrete Patio for Your Home
Have you ever looked at your backyard and thought, "This could be so much more"? You're not alone! Many homeowners dream of creating a beautiful and functional outdoor living area. Enhance your outdoor area with the beauty and strength of a stamped concrete patio.
What Is Stamped Concrete?
Stamped concrete is regular concrete shaped with special molds, creating unique patterns and textures. These patterns can imitate costly materials like brick, stone, slate, or wood. The best part? Stamped concrete costs less than other materials but still offers a high-end appearance.
Think of stamped concrete as a blank canvas. You can pick almost any color, pattern, or texture to match your home's style. It's like custom-designed flooring for your outdoor area!
Why Choose a Stamped Concrete Patio?
Before diving into the "how," let's discuss the "why." A stamped concrete patio offers several advantages:
Durability
Concrete is strong and can last for decades if installed and maintained correctly. Stamped concrete won't rot like wood decks or shift like pavers. It stays in place and withstands the weather.
Aesthetics
The range of patterns and colors is impressive. You can achieve the look of:
- Natural stone
- Brick
- Slate
- Cobblestone
- Tile
- Wood planks
These options help you build a patio that matches your home's design and taste.
Cost-Effectiveness
Stamped concrete is pricier than plain concrete but costs less than many other choices. According to homeguide.com, "Regular concrete slabs cost $5 to $10 per square foot. Stamped concrete typically runs $8 to $19 per square foot."
This is excellent value compared to natural stone or pavers, which can be much pricier.
Easy Maintenance
Stamped concrete has no joints where weeds can grow, so it needs less maintenance than pavers or wood decks. Simple cleaning and periodic resealing keep your patio looking great.
Planning Your Stamped Concrete Patio
Now, let's explore how to incorporate a stamped concrete patio into your home landscape.
Step 1: Determine the Location and Size
First, decide where your patio will go and how big it will be. Consider:
- How you'll use the space (dining, lounging, entertaining)
- Existing landscaping.
- Access to your home.
- Views to highlight or hide.
- Sun and shade patterns occur throughout the day.
- Drainage issues.
Step 2: Design Your Patio
This is the fun part! Pick the pattern, texture, and color to make your stamped concrete patio stand out.
Patterns
Common stamping patterns include:
- Ashlar slate (rectangular stones in various sizes)
- Random stone
- European fan
- Herringbone
- Wood plank
- Cobblestone
- Brick
Colors
For colors, you have two main options:
- Integral color - blended into the concrete before it's poured.
- Color hardener - spread over the surface of newly poured concrete.
You can add accent colors using release agents. These agents stop the stamps from sticking and add secondary colors.
Step 3: Find a Qualified Contractor
Installing stamped concrete is not a DIY project unless you're an expert in stamped concrete patio contractors near you in Massachusetts. It requires specialized knowledge, tools, and experience.
Look for contractors who:
- Specializing in decorative concrete.
- Have portfolios of completed projects.
- Offer references from satisfied customers.
- Are appropriately licensed and insured.
The Installation Process
Knowing the installation process prepares you for each step and guarantees quality results. Here's what to expect. This also ensures quality work. Here's what usually happens:
Site Preparation
The contractor will:
- Mark out the patio area.
- Excavate to about 8-10 inches deep.
- Remove all vegetation, roots, and debris.
- Install forms (wooden boards) to shape the patio.
Reinforcement
Proper reinforcement is essential for a lasting patio:
- A layer of crushed stone is compacted to create a solid base.
- A rebar or wire mesh is placed for strength.
- Plastic sheeting might be laid to prevent moisture from seeping up.
Pouring the Concrete
On pouring day:
- Concrete trucks deliver the ready-mixed concrete.
- Workers spread and level the concrete within the forms.
- If using integral color, the concrete arrives already colored.
- If a color hardener is used, it is applied to the wet surface.
- The concrete is smoothed with special tools.
Stamping
This phase requires precision and speed:
- Once the concrete begins to set but is still workable, stamping starts.
- A release agent is applied to prevent sticking.
- Stamps are pressed into the concrete in a specific pattern.
- Workers move carefully, using boards to avoid stepping directly on the concrete.
- Flexible mats or hand tools stamp edges and hard-to-reach areas.
Finishing Touches
After stamping:
- The patio cures for several days.
- Any excess release agent is washed away.
- Saw cuts might be added to control cracking.
- A sealer is applied to enhance color and protect the surface.
Caring for Your Stamped Concrete Patio
To keep your existing concrete patio looking great for years:
Regular Cleaning
- Sweep regularly to remove debris.
- Wash with water and mild detergent as needed.
- Steer clear of harsh chemicals that might harm the sealer.
Resealing
- Reapply sealer every 3 to 5 years.
- This maintains color and protects against stains.
- Follow the manufacturer's recommendations for the sealer used.
Crack Prevention
- Ensure proper drainage away from the patio.
- Keep heavy vehicles off the patio and walkways.
- In cold climates, use only non-corrosive de-icers.
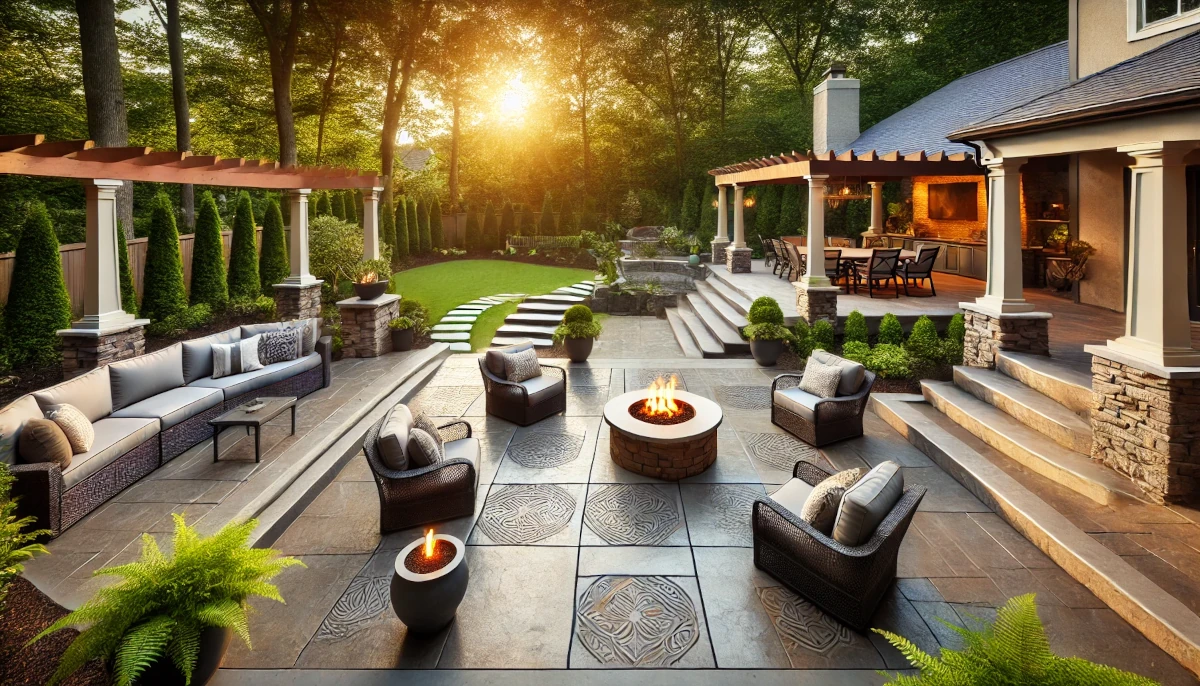
Common Stamped Concrete Patio Features
You can improve your stamped patio with these popular concrete surface features:
Borders
A new concrete opposing border can help define the space and add visual interest. Borders might use different patterns, colors, or both.
Built-In Seating
Consider adding concrete patio design benches or walls for a seamless look.
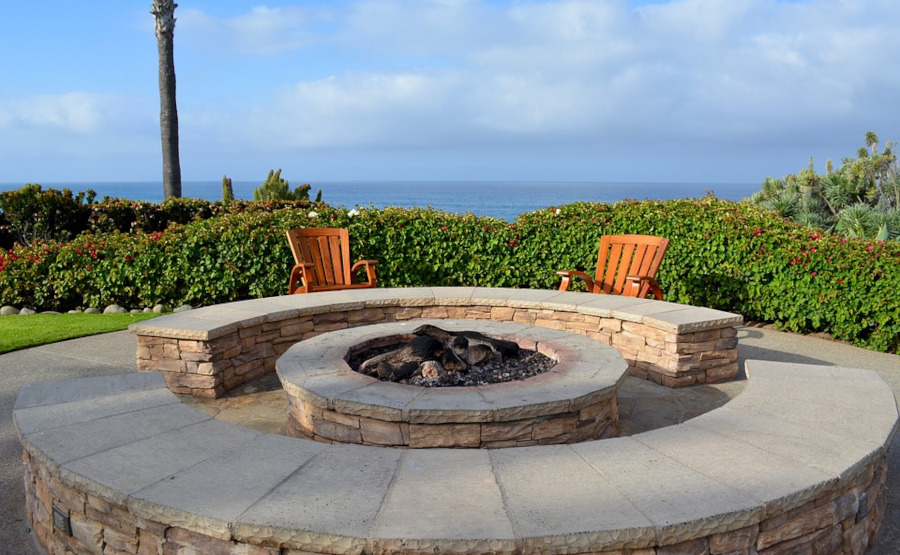
Fire Pit
A fire pit adds value, creates a focal point, and extends the usability of your patio into the cooler months.
Outdoor Kitchen
Integrate cooking and dining areas for the ultimate outdoor entertainment space.
Steps and Multiple Levels
A sloped yard can look great with a multi-level patio. Stamped concrete steps add style to the design.
Making the Most of Your Stamped Concrete Patio
Once your patio concrete project is complete, consider these additions to make the space livable:
Furniture
Choose backyard patio furniture that complements your patio's style and color. Weather-resistant materials like teak, aluminum, or all-weather wicker are good patio or walkway options.
Lighting
Outdoor lighting extends the use of your patio into the evening. Consider:
- String lights for a festive feel.
- Path lights for safety.
- Spotlights to highlight landscaping features.
- Built-in LED lights are incorporated into the construction.
Shade
Make your patio comfortable on hot days with:
- Pergolas
- Retractable awnings
- Large umbrellas
- Shade sails
A stamped concrete patio is a great way to enhance your outdoor living space. Stamped concrete is popular because it's durable, versatile, and cost-effective. In these areas, it outperforms natural stone and pavers.
Plan your design well, hire a good concrete contractor, and maintain your patio. This way, your family will enjoy the outdoor space for years. Your stamped concrete patio is great for barbecues, morning coffee, or relaxing by the fire pit at night. It's the perfect spot for making lasting memories.