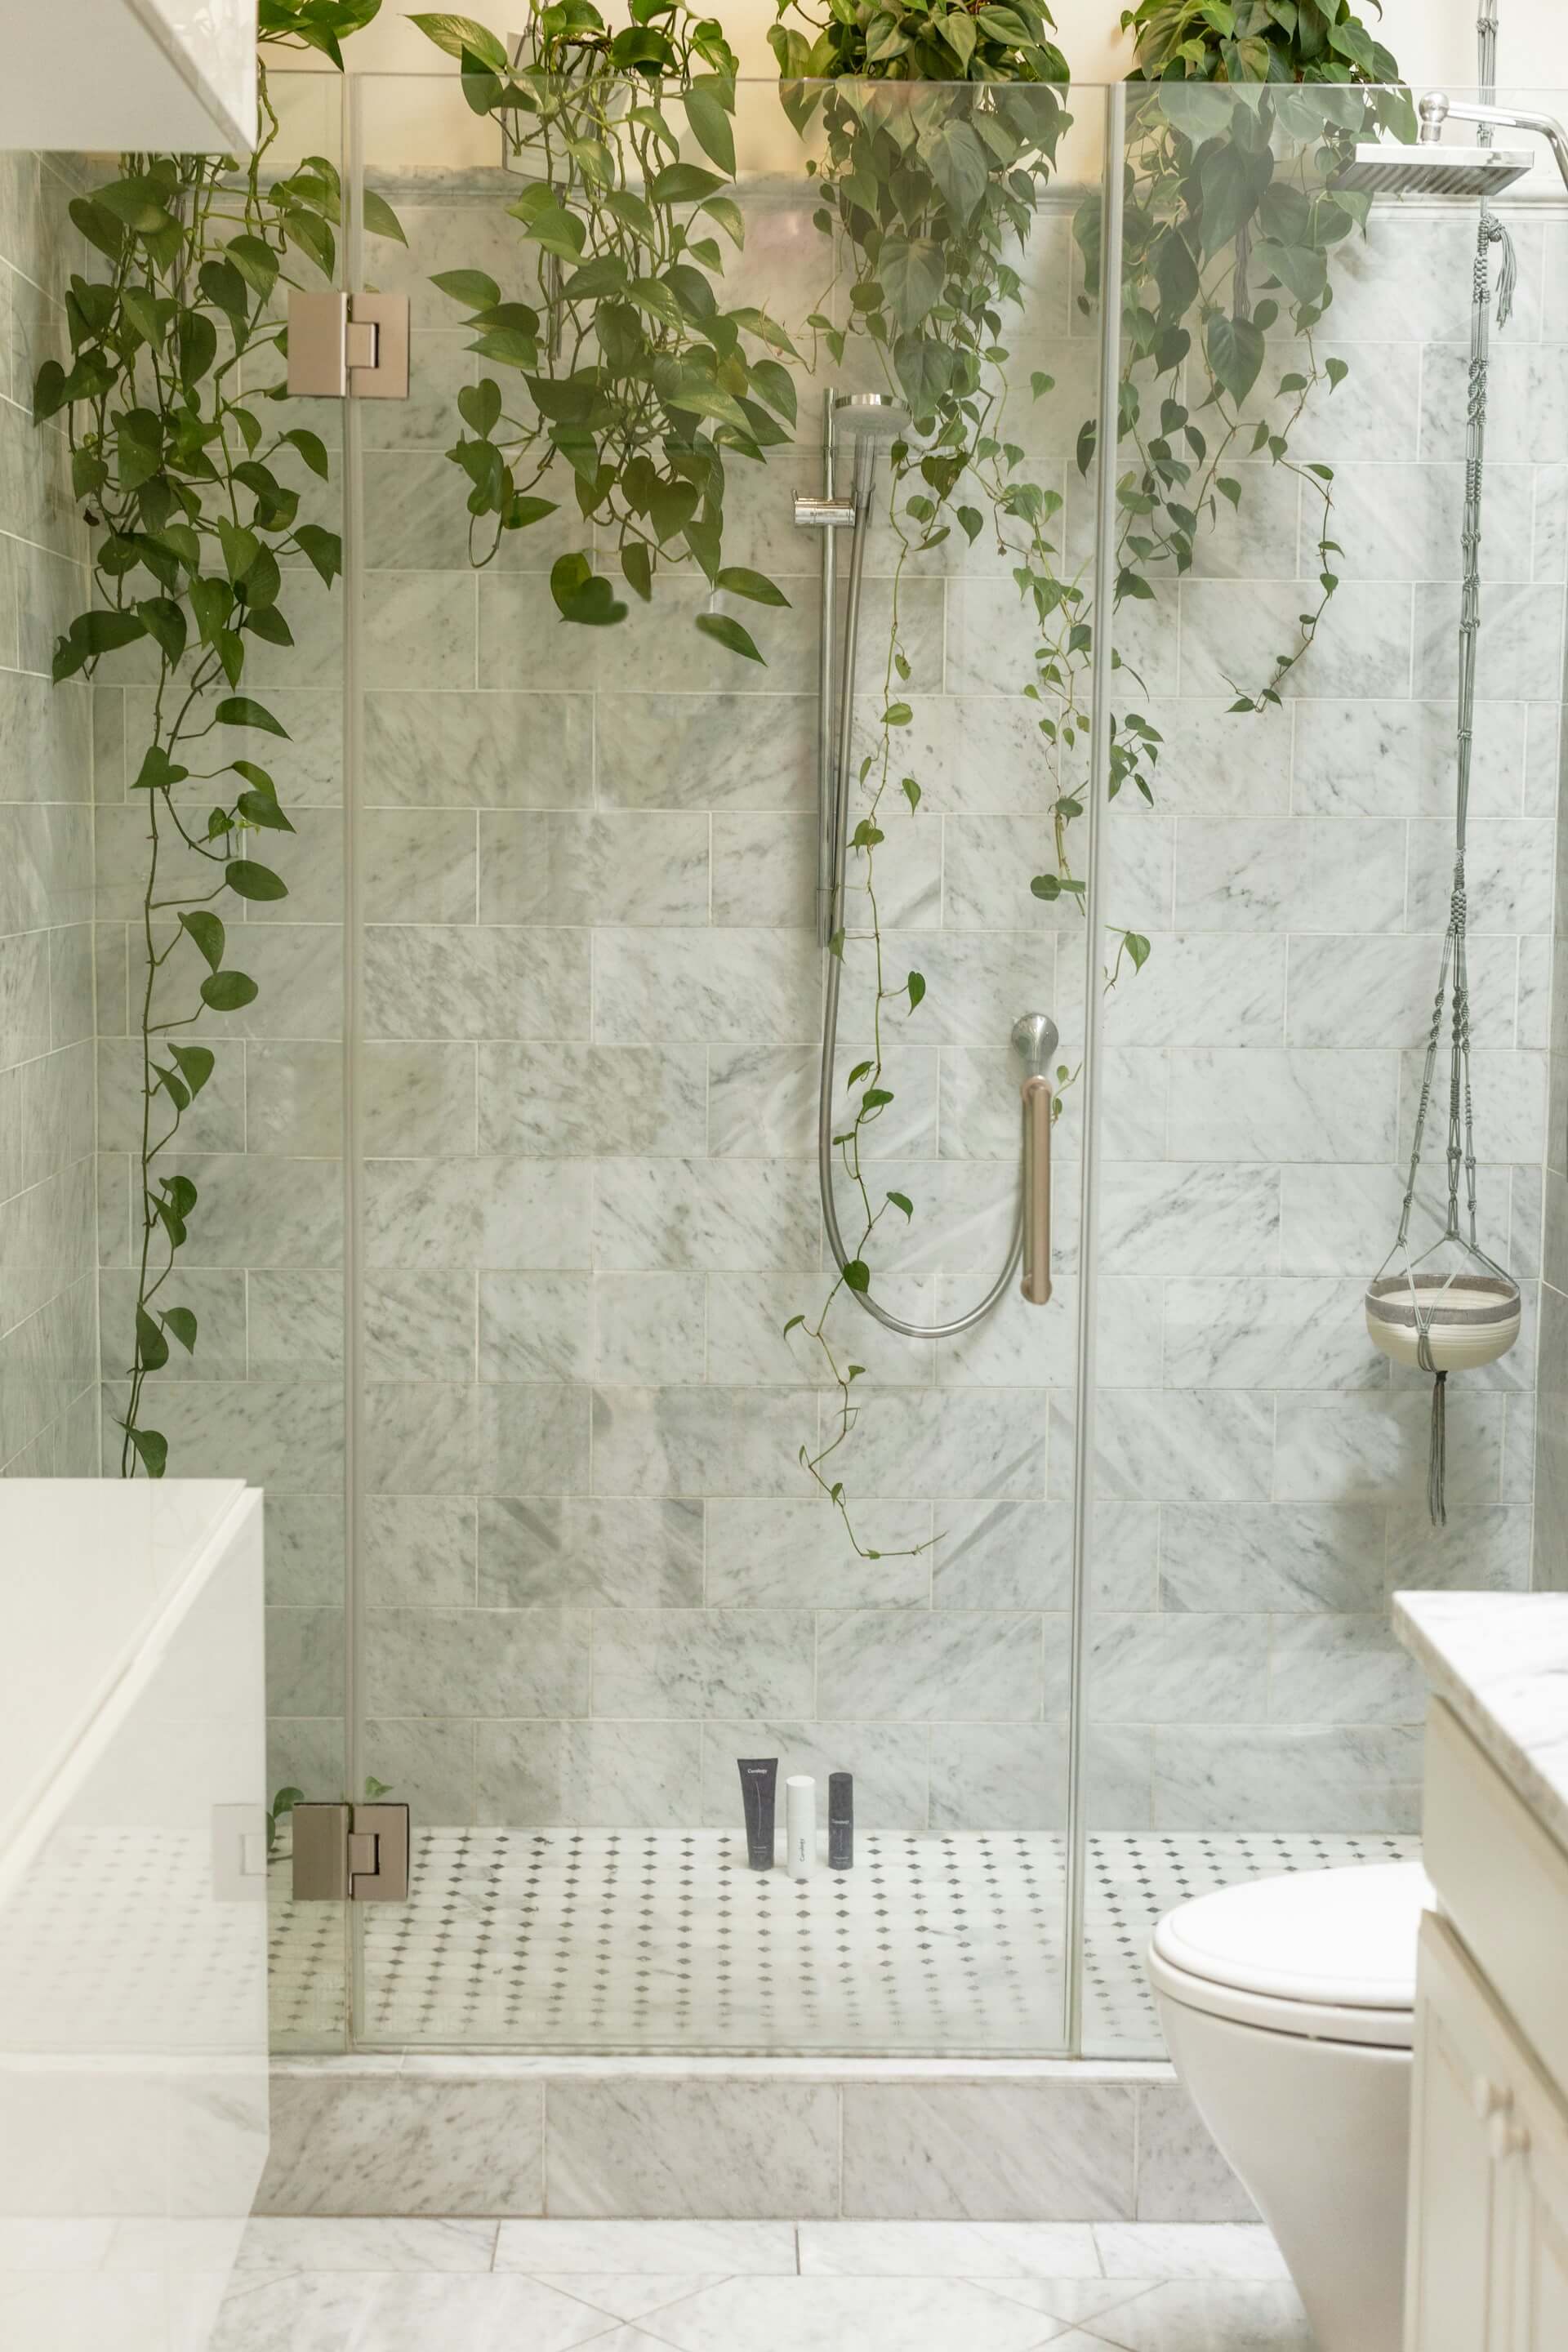
How to Install Shower Glass Doors and Panels on Tile
If you're ready to upgrade your bathroom with sleek and stylish glass shower doors, you're in the right place! Installing glass doors and panels on tiles might seem tricky, but with the right steps and tools, you can do it yourself. In this guide, we'll walk you through the process from start to finish. Whether you're an experienced DIY-er or just getting started, this guide is easy to follow.
Tools and Materials You'll Need
Before you begin, gather these essential tools and materials to make the installation smoother:
- Glass shower doors and panels
- Measuring tape
- Glass clamps or hinges (as per your door type)
- Screws and anchors
- Tile drill bit (diamond or carbide-tipped)
- Power drill
- Level
- Silicone caulk
- Rubber mallet
- Painter's tape
- Pencil or marker
- Safety gear (gloves, safety goggles)
Step 1: Measure Your Space
Proper measurements are key to a successful installation. Follow these tips for accuracy:
- Measure the opening: Use your tape measure to get the width and height of your shower opening. Measure both at the top and bottom, as walls can sometimes be uneven. Use the smallest measurement for your door.
- Check for level: Use a level to make sure the walls and floor are even. If they aren't perfectly level, don't worry. The glass panels can still be installed with adjustments.
Pro Tip: Double-check your measurements! A mistake here can cause big problems later.
Homeowners planning to set up swinging shower doors know that even a fraction of an inch of miscalculation can prevent the glass from closing tightly or clearing nearby fixtures. Taking the time to accurately measure the opening across the top, middle, and bottom ensures a seamless fit and prevents water from leaking onto the bathroom floor.
Step 2: Mark the Placement of Your Glass Panels
Once you have your glass panels, it's time to mark where they will go:
- Dry-fit the panels: Place the panels in the opening without any hardware to see how they fit.
- Mark the locations: With the panels in place, use a pencil or marker to mark where the clamps or hinges will be attached to the tile. This ensures you'll drill in the right spots.
Step 3: Drill Holes in the Tile
Drilling through tile requires extra care. Here's how to do it safely:
- Use the right drill bit: A diamond or carbide-tipped drill bit is essential for cutting through tile without cracking it.
- Go slow: Start with a low speed to avoid damaging the tile. Use painter's tape over the area you're drilling to help the drill bit grip better.
- Keep the bit cool: Use a little water to keep the drill bit cool and reduce the risk of cracking.
Safety Note: Always wear safety goggles and gloves when drilling through tile.
Step 4: Attach the Glass Clamps or Hinges
With your holes drilled, it's time to attach the hardware:
- Install the clamps or hinges: Secure the clamps or hinges into the holes you've drilled using screws and anchors. Make sure they are tightly fastened but don't overtighten, as this could crack the tile.
- Check for level: Use your level again to ensure the clamps or hinges are perfectly straight before fully tightening them.
Step 5: Install the Glass Panels
Now that the hardware is in place, you can install the glass panels:
- Carefully position the glass: With the help of a friend (glass is heavy!), place the glass panels into the clamps or hinges. Ensure they are sitting straight.
- Tap gently if needed: Use a rubber mallet to gently tap the glass into place if it's slightly misaligned. Avoid using too much force.
- Secure the glass: Once the glass is in position, secure it by tightening the screws in the clamps or hinges.
Pro Tip: Be gentle when handling glass. One wrong move can result in a costly break.
Step 6: Install the Shower Door
Now that the panels are up, it's time to hang the shower door:
- Attach the hinges: If you're installing a hinged door, attach the door to the pre-installed hinges. Make sure it opens and closes smoothly.
- Install the sliding track (if needed): For sliding doors, install the top and bottom tracks as per the manufacturer's instructions. Ensure the rollers move freely along the track.
- Check for gaps: Make sure the door fits snugly and there are no gaps between the door and the panels.
Step 7: Apply Silicone Caulk
To keep water from leaking out of your shower, you'll need to seal the edges of the glass:
- Apply silicone: Run a bead of clear silicone caulk along the edges where the glass meets the tile and between any joints. This seals the area and prevents water leaks.
- Smooth it out: Use a wet finger or caulk-smoothing tool to smooth out the caulk for a clean finish.
- Let it dry: Allow the silicone to cure for at least 24 hours before using your shower. This ensures a watertight seal.
Step 8: Final Touches and Cleanup
With everything installed and sealed, you're almost done! Finish up with these steps:
- Clean the glass: Use a glass cleaner and a soft cloth to remove any fingerprints, smudges, or dust from the installation process.
- Test the door: Open and close the shower door to make sure it functions smoothly. Check for any wobbles or misalignment.
- Enjoy your new shower! Step back and admire your handy work! You've just installed a stunning glass shower door and panel.
Troubleshooting Tips
Even with careful installation, you might run into a few common issues. Here's how to fix them:
- Uneven gaps: If the door or panel isn't sitting evenly, loosen the hardware slightly and readjust.
- Water leaks: If water is escaping from around the edges, check the silicone caulking. Reapply or add more caulk where needed.
- Door sticking: If the door doesn't open or close easily, check the alignment of the hinges or rollers. Adjust as necessary.
Conclusion
Installing glass shower doors and panels on tile is a rewarding DIY project that can elevate the look of your bathroom. By following these steps, you'll ensure a smooth installation with professional-looking results. Take your time, be patient, and soon you'll have a beautiful, watertight glass shower enclosure that enhances both style and function in your bathroom.
Frequently Asked Questions
Should I install shower glass doors myself or hire a professional?
Confident DIYers with the right tools can handle most standard glass shower door installations — the work is methodical rather than technically difficult. Hire a professional if you're dealing with custom glass cuts, frameless doors heavier than about 80 pounds, walls that are noticeably out of plumb, or unusual tile materials like natural stone that crack more easily under drilling. The downside of getting it wrong is a cracked tile wall, a broken glass panel, or a leaky enclosure that damages the wall behind it — any of which costs more than hiring out from the start.
What kind of drill bit do I need to drill through bathroom tile?
Diamond-tipped or carbide-tipped tile drill bits. Standard masonry bits will work on softer ceramic but struggle with porcelain and crack it more often than not. Diamond bits work on virtually any tile material including porcelain and natural stone. Use the bit at low speed, keep it cool with a steady drip of water (or a wet sponge held against the work area), and apply only light pressure — let the bit cut at its own pace rather than forcing it.
How do I keep the drill bit from slipping on the tile surface?
Apply painter's tape over the area you're drilling first — the tape gives the drill bit something to grip and stops it from wandering across the glazed surface. Mark your drill point with a pencil on top of the tape. Start the drill at very low speed and let the bit etch a starter divot before increasing speed. A center punch can also create a starter dimple, but on tile this risks cracking — the painter's tape method is safer.
What's the most common mistake DIY installers make?
Skipping the dry-fit step. Glass shower panels are heavy, expensive, and unforgiving. Installing them without first dry-fitting the entire assembly (without screws or caulk) means discovering measurement or alignment problems with the glass already in your hand. The second most common mistake is overtightening hardware on the tile, which cracks the tile from the inside. Finger-tight plus a quarter turn is usually right; anything more invites trouble.
What's the difference between framed and frameless shower doors?
Framed doors use a metal frame (usually aluminum) around the glass perimeter that handles structural load and sealing. They're more forgiving of out-of-plumb walls, cheaper, and easier to install. Frameless doors use thick tempered glass (typically 3/8 to 1/2 inch) held only by clamps and hinges anchored into the tile. They look cleaner and more modern, command higher resale value, but require precise installation and stronger anchor points. For a DIY first attempt, framed is the safer choice.
How thick should the glass on a shower door be?
Framed doors typically use 3/16 to 1/4 inch glass since the frame handles structural load. Frameless doors need 3/8 inch minimum and 1/2 inch is standard for larger panels — the glass itself is what holds the assembly together, so thickness matters. All shower glass should be tempered safety glass which breaks into small rounded pieces rather than sharp shards if it ever fails. Annealed (regular) glass should never be used in a shower.
How heavy are glass shower doors and how do I handle them safely?
A typical framed door weighs 30-50 pounds; a frameless 1/2 inch door can weigh 80-120 pounds. Always have a second person available for lifting and positioning — glass is unforgiving when dropped. Wear cut-resistant gloves and safety glasses during handling. Keep the glass vertical when carrying, never horizontal, since horizontal flex stress can crack tempered glass. Set the glass on a soft surface (cardboard or foam) when laying it down rather than directly on tile or concrete.
How long does the whole installation take?
Plan on a full day for a first-time DIY installation — about 6-8 hours of active work, plus 24 hours of curing time for the silicone caulk before you can use the shower. The drilling and dry-fitting take the most time; the actual installation moves quickly once the hardware is anchored. Don't try to compress the schedule; rushing through silicone application or skipping the curing time leads to leaks that show up weeks later.